We are getting very close to painting the Roamer. Once we start painting “the shiny,” as my chief Boatamalan calls it, the paint work and exterior wood will be finished in seven days. Finally…it’s been a long time coming.
But before that happens, we still need to wrap up some things around the aft enclosure. We really like the fillet approach we’re using on all of the hard inside corners elsewhere on the boat, so we’ll use that same approach aft. We have to longboard the Awlquik we applied the previous weekend and finish fairing the aft deck above the transom. There are also a couple of screw holes and cracks we found on the underside of the original hardtop. But that’s pretty much it.
Wow.
I can’t believe how short the honey-do list has become. 🙂

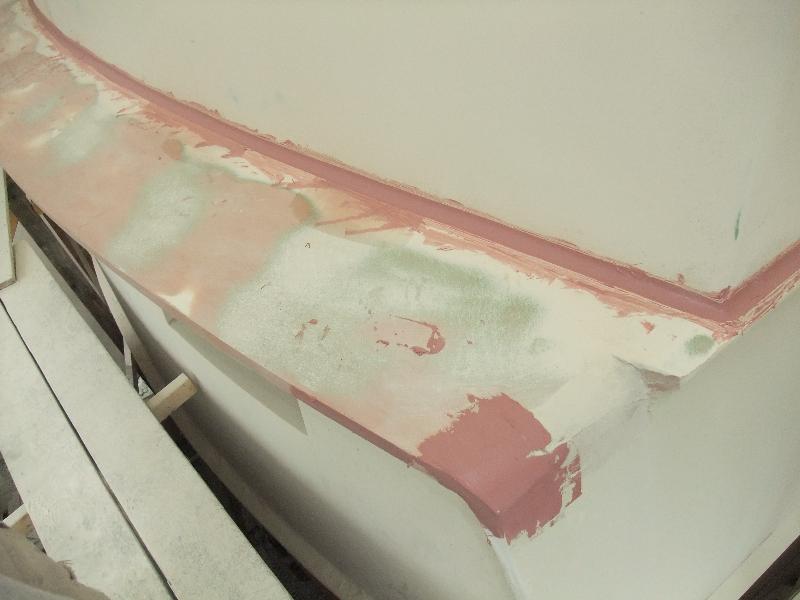
Fillets and touch ups after longboarding the Awlquik,
The aft enclosure panels, being 3/16 5052 aluminum plate, were already pretty flat. Three good coats of Awlquik on top of the Max Cor aluminum primer gave us plenty of material to longboard without breaking through.
The stubby deck aft of the enclosure is a particularly challenging piece because a lot of welding happened here when Chris Craft built the boat in 1969. A lot of welding means a lot of heat, and even ALCOA’s finest plate tends to warp when it gets really hot. The result is a lot of fairing compound — up to 3/8″ in spots, but with aluminum high spots only a foot away! This deck will be mostly non-skid, so we’re not spending too much time on the middle, but the Boatamalans take great pride in their work and they’re making sure the shiny rim around the outside and at the fillets will be faired true.
In all honesty, though, even in the spots where they don’t put much effort in, these guys make the panels truer than most of the boats you see at any marina. They’re used to doing things to Weaver Boatworks’ high standards, so even their sloppiest work tends to be very, very good. There have been a few times when I’ve suggested to my chief Boatamalan that maybe, you know, a particular area doesn’t have to be that good. It is, after all, a metal boat. Sometimes he agrees, but most of the time he responds with a friendly lecture about quality and I see his point–when you’re taking the time to do it just so, why cheap out on the last five percent?

Seam? What seam?
I have to say…I didn’t think the Boatamalans were going to be able to do much to cover the hard seam line on the aft enclosure back panel without using a huge amount of putty. But, as when we faired the cabin top, you put lots of fairing compound on, then sand most of it off and repeat. By the time you’re done with the six-foot, two-man longboard and sand until you just hit the first high spot, you’ve got a very true surface with the least amount of compound required. The seam has vanished!

FRP covers the aft threshold seams.

Good lookin’ fillets!
The secret to nice fillets is…cake-making tools. Yup. The same spatulas of varying widths with the rounded leading edge that cake makers use to artistically apply frosting works very well for fillets in fairing compound, too.

Fillets at the helm door

Almost ready for a sliding door track.

FRP crack repair
There were long “gelcoat cracks” in both corners of the hardtop. When we ground into them, we found the cracks extended into the FRP matrix. So, as with the cracks we found in the cabin top, we ground them down and did a right proper repair. If we’re taking all this time to prep for paint, it just makes no sense to not put in the slight additional effort.

Ditto on the port side.

We repaired an odd crack near the leading edge of the hardtop, too.
The top-side of the hardtop is already painted with the shiny and non-skid. We use two layers of 20-foot wide Sharkskin to cover the paint and protect it from overspray from below.

Finally done longboarding the bullet-proof cabin top.

And finally done with the bow seat, too.

The hatches under the bow seat are flat…but the panel is curved.
These hatches will allow us to take advantage of the compartments I built into the bow seat. Access isn’t the greatest, but they’ll be fine for line storage.

The hatch is the mold for the fairing compound.
First, I applied a layer of shrink wrap tape all the way around the hatch frame so the fairing compound doesn’t stick to it. Next, I applied fairing compound to the FRP panel around the hatch opening. Then I installed the hatch so the middle of it fit tightly to the bow seat panel, with fairing compound filling the gaps at the ends. I put fillets on the compound and let it cure. All I have to do now is pop the hatches out and fill pin holes. This is more or less the same approach we used when making the corners of the helm door openings.
And that’s a wrap 🙂
I’m beat.
Next up on our 1969 Chris Craft Roamer 46 Refit: Final Priming with Awl Grip 545!

Admire the bullet proof cabintop and fillets. Got the same “gel coat” cracks in my hardtop. Will remedy soonest. Further analysis of your new helm door decks reveals sufficient room for install of outboard 50 cals – something to consider in S MD, no?
Cheers!
Eric
(weexpoxyprimenextweekporovidedigettransomdoneintime)