Since we wrapped up the aft enclosure fairing, fillets and other details, the next step toward getting our Roamer painted is applying the last coat of primer I hope to ever put on her. I like the boat and all, and one can never have too much fairing compound dust in every crack, pore, and orifice, but enough is enough. 🙂
We started the day with some light hand-sanding, mostly to knock Awlquik overspray off of surfaces that were already faired with 240 grit Mirka Abranet. When it comes to sandpaper, Mirka and 3M Green Corp are the only way to go. You can save a dime buying other abrasives, but you’ll waste dollars in labor from wimpy sandpaper. You’ll also use 3-5x the paper, so even if the cheap stuff costs half as much, you’ll still spend more.
Anyway, we also sanded the aft enclosure fillets in preparation for one last application of Awlquik.
Once the sanding was done, we pulled off all of the plastic we used during the Awlquik course over the rest of the boat–that stuff makes more dust than you can imagine. After doing a thorough clean up with the shop vac and hitting the whole thing with compressed air, we pulled the 3M hand-masking plastic films (99″, 72″, 48″, 36″ and 24″) and 3M 233+ green tape from “the clean room” (AKA the aft stateroom), and covered up everything we didn’t plan to hit with Awl Grip Awlquik or 545 epoxy primer. Then we broke out the pressure pot and personal protective equipment, fired up the compressed air dryer and exhaust fans, and got to spraying.
The results, if I do say so myself, are freakin’ awesome. Way to go Boatamalans! 🙂

First, we shot some Awlquik primer around the stern.
We’d longboarded the aft enclosure and did fillets the day before, so we only had to hit the fillets and little patches in the fairing work with Awlquik.

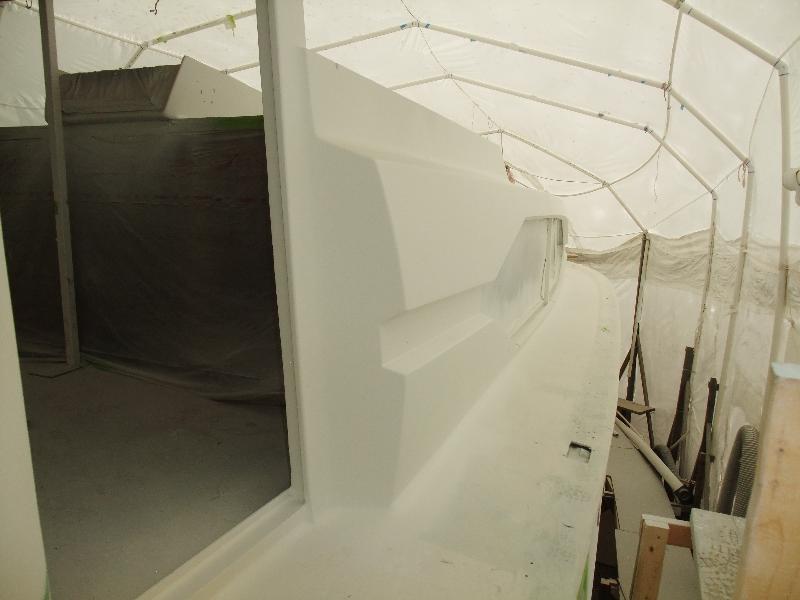
The aft-most section of the aft deck is now primed in Awlquik.
The guys did a great job making that line-handling deck fair, and the fillets make it look like the aft enclosure was always part of Chris Craft’s design.

The weld seam I was so concerned about on the aft panel has magically disappeared.

The fillets all the way around turned out very nicely and the rounds at the turn of the hull…belíssimo!
With the Awlquik done, we switched up to 545 primer and made the cabin top pretty.

Starting at the stbd side of the helm.
The 545 primer doesn’t hold a shine once it dries, so you can’t see how fair the dashboard is…but it is very smooth. The fillets at the instrument pod are sooo much better than the original dirt-catching seam.

What do you mean they didn’t make it this way from the factory???
Again, props to the Boatamalans for making my helm door opening concept come to life.
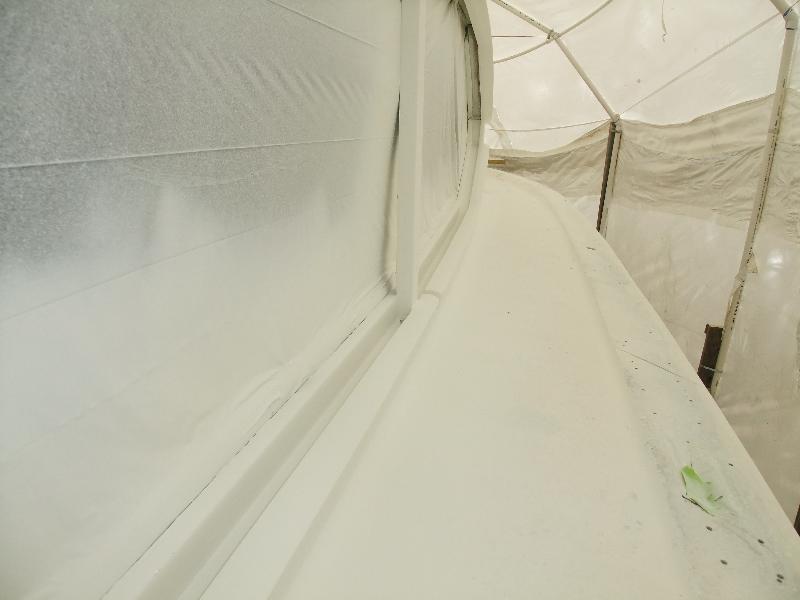
The long view down the stbd side.
One thing about having white 545 on a boat that’s inside a white shrink wrap tent with white PVC frames–there’s no contrast anywhere. The fillets don’t help; hard seams with gaps would be easier to see. Everything is so smooth, you can’t see the details in pix!

The bullet-proof dashboard and windshield base never looked better.
This will look better with dark tinted salon windows.

- Beneath this smooth surface lies the bullet-proof cabin top.
Hard to believe there was a big hole in the salon roof just a few short months ago.

Sha-wing!

All of those complex curves and fillets disappear in the white haze.
I can’t wait to see it painted with “the shiny” and with the tent gone!

Dark tinted windows will look good here, too…and the center one will open!
The bow seat has come so very far since November 2012, when I cut off the old one and made what you see here.

Again, beautiful fillets and rounds you can’t see from all the white!

I do like that line down the cabin top.
And that line down the cabin top will never crack like the original did.

More nice fillets…that you can barely see in pix!
My running theory is that if the Boatamalans hadn’t done such a nice job on the fillets, you could see them more clearly because the imperfections would provide a degree of contrast. Damn those perfectionist Boatamalans and their flawless work! 😉

This view almost brings a tear to my eyes. It’s just so…nice.

A new African mahogany accent piece finished bright will go well here.

Long view down the port-side deck.
Again and again and again, props to the Boatamalans for making my helm door concept a reality.


Dang…that turned out nice.

It’s like all we had to do was pick up where the Chris Craft designers left off.


The helm side window opening where it meets the hardtop…almost like Chris Craft planned it that way.

The port helm door opening at the joint with the hardtop.

Gotta love the dashboard fillets!
That’s a wrap for the 545 primer on the cabin top and dashboard. Unfortunately, we’ve had a bit of bad news from afar, so I’ll be taking two weeks off of the project to go pay last respects to my mother-in-law. I’ll pick it up again when I get back.
Next up in our 1969 Chris Craft Roamer 46 Refit: Installing the Mahogany Toe Rail.
