This one’s been a long time coming.
For the second time on this refit, I’ve installed brand new cutlass bearings and put the shafts in. The first time around, back in 2009, I was still using the original 1.5 inch Aquamet 17 shafts, which seemed more than adequate for the 120hp Lehman diesels I installed on the first go-round. Since we decided in 2012 to run with Cummins 450 Diamonds instead, we cut off the old strut barrels and welded on new ones last fall that are sized for the new 1.75″ Aquamet 22 shafts. I had to resize the phenolic bearing housings just a bit because the heat of welding moved two of the strut barrels around just a bit. Removing just a wee bit of the phenolic bearing housing allows the bearing to move around inside the strut barrel, which allows them to self-align when the shafts get slid into place. Epoxy fills the interstitial space between the phenolic bearing and aluminum strut barrel, which “float aligns” the bearings and locks them in place in perfect alignment.

Brand new shafting off to the machine shop

Cutlass bearing fits in the strut barrel but is still a bit too tight for float alignment

Shopsmith 12″ disc sander helps ensure consistent material removal
Black marks indicate tight spots…back to the Shopsmith sander.

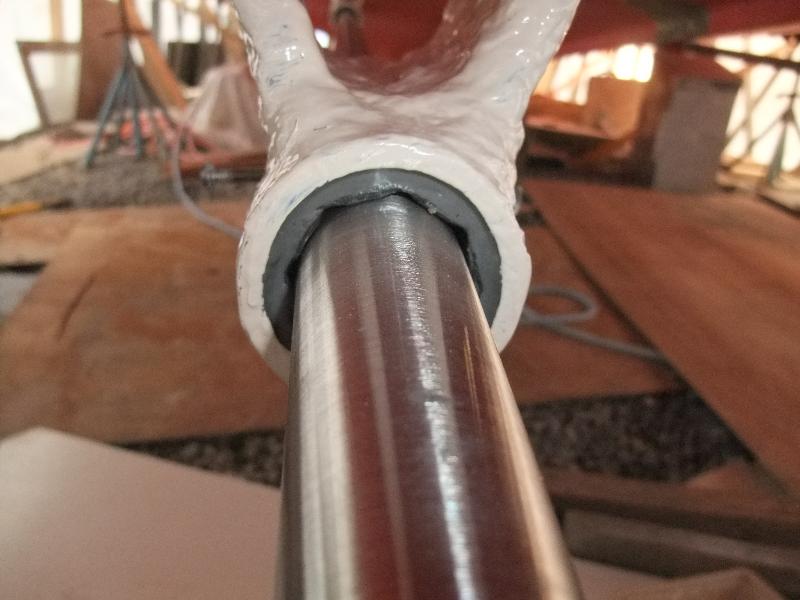
Nice fit…just enough gap for a good epoxy bond and flexibility for alignment purposes

Stern tube bearing looks good

Dry-fitting the shafts
Dry fitting the shafts was a good idea, just to verify that the bearings all had enough clearance from the strut barrels to self-align. But I gotta tell ya…those one-piece shafts are heavy! After dry fitting, the shafts and bearings came out (after I marked the bearing orientation) and I mixed up the epoxy potting compound.

Cutlass bearings float aligned in thickened West System epoxy
First, I treated the aluminum with Alumiprep and Alodine, scrubbed in with a stainless brush. After the metal dried, I mixed up some West System epoxy and thickened it with their 422 barrier coat additive (which basically looks like aluminum powder). After coating the inside of the strut barrel and phenolic bearing housing, I slid the bearings home. Then, just to be sure of good coverage, I used a syringe to inject potting material in via the 1/4-20 set screw holes on either side of the strut barrel.

Bearings float aligned and struts get barrier coated little by little

“Hot coating” Devoe Coatings barrier coat over West System
Good bearing clearance all the way around
I’ll smooth out the barrier coat later, and then apply one or two final coats of Devoe, followed with Pettit Vivid bottom paint.
The float alignment process worked well. A week has passed and with the epoxy fully set I can easily rotate the shafts with one hand. Now that the shafts are in, I need to obtain and install propellers so I know exactly where the gear coupler will need to be. Once I know that, I can move the engines back and install them on the engine beds I started building a month or so ago.
But until the props show up, there’s plenty of other things to do.
Next up on our 1969 Chris Craft Roamer 46 Refit: Classic Chrome Bits & Pieces
